How to Root Your Tolino Tab 8: Step-by-Step Guide

The Tolino Tab 8 has been on the market for almost a year now, but it continues to offer great value for money, partly due to regular sales promotions. In our review, the tablet left a very good impression, so I’ve also used it privately over the past few months.
A few days ago, after my Nexus 7 became unusable due to a broken display, I reached a point where I wanted to root the Tolino Tab 8. As a rule, I usually root Android smartphones and tablets that I use regularly to make various changes that aren’t typically intended. In fact, I even choose my purchases based on how customizable the device is.
Now it was the Tab 8’s turn, and after a brief search for a root solution, I found one on XDA-Developers. They offer a tool for installing a temporary recovery session on Intel-based Android devices, which can then be used to establish root access.
So I followed the provided steps, along with a few additional ones, and ultimately, the Tab 8 was rooted. The necessary steps are described below.
The following photo gallery shows the installation of the TrekStor ADB drivers:
[metaslider id=65431]
- To start, you need the root package (46.36 MB), which contains all the necessary files to gain full access to the Tab 8.
- Extract the ZIP file into any directory on your Windows PC.
- Before proceeding on the PC, grab the tablet and go to the system settings. There, select “About tablet” and tap “Build number” seven times in quick succession. This will unlock developer mode.
- Once that’s done, go back to the settings menu and select the new “Developer options” entry. Activate “USB debugging”.
- Connect the Tolino Tab 8 to the PC via USB and wait a moment.
- Now, go to the Control Panel on your computer and open Device Manager. Here, you’ll find an unknown device (MTP – see image 1). This is the Android ADB interface. For it to work correctly, you need to install the TrekStor driver.
Note: The Tolino Tab 8 is manufactured by TrekStor. - Double-click to open the details, switch to the “Driver” tab, and click “Update Driver”. Continue with “Browse my computer for driver software”, then navigate to the “1_android_winusb_TrekStor” directory from the root package and confirm the selection (images 2-4).
- During installation, a pop-up might appear indicating that the driver couldn’t be verified. You can dismiss this by clicking “Install this driver software anyway” (image 5).
- After the driver is installed (images 6 & 7), open the root package in File Explorer and choose the “2_Vendor_ID” directory. Run the file (2_vendor_id.bat) found there. The console window that appears will close after a moment. This step ensures ADB recognizes the tablet via its hardware ID.
- Copy the “UPDATE-SuperSU-v2.46.zip” file from the root package onto the tablet without extracting it (!). The Tab 8 should remain connected.
- Next, start the “launcher.bat” file from the “3_IntelAndroid-FBRL-07-24-2015” directory within the root package.
- A new window will open, in which you read the note and confirm by entering “ACCEPT”.
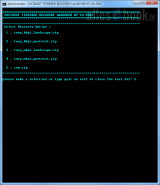
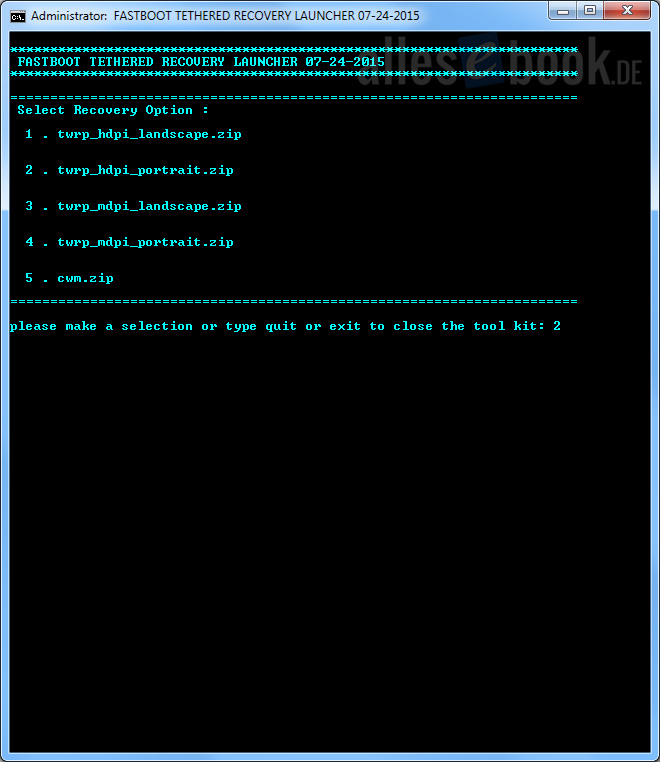
 Next, choose either option 2 “twrp_hdpi_portrait.zip” or option 5 “cwm.zip”. Both options generally work, but the touchscreen is not very responsive under TWRP, so navigating using the volume keys with CWM is easier. The following steps are the same for both options.
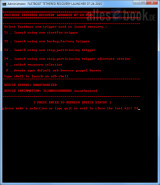 Upon selection, a new list will appear. At this point, you will also be able to verify if the ADB connection was correctly installed. Beside “Device Information”, there should be a 15-digit combination of numbers and letters. If it says “UNAUTHORIZIED” instead, the driver installation or vendor ID setting was unsuccessful, and you should repeat the previous steps.
- If the device is recognized, select “T4 . launch using oem stop_partitioning trigger alternate version” and confirm by pressing Enter.
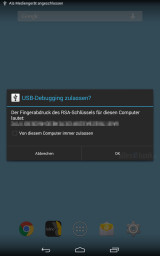
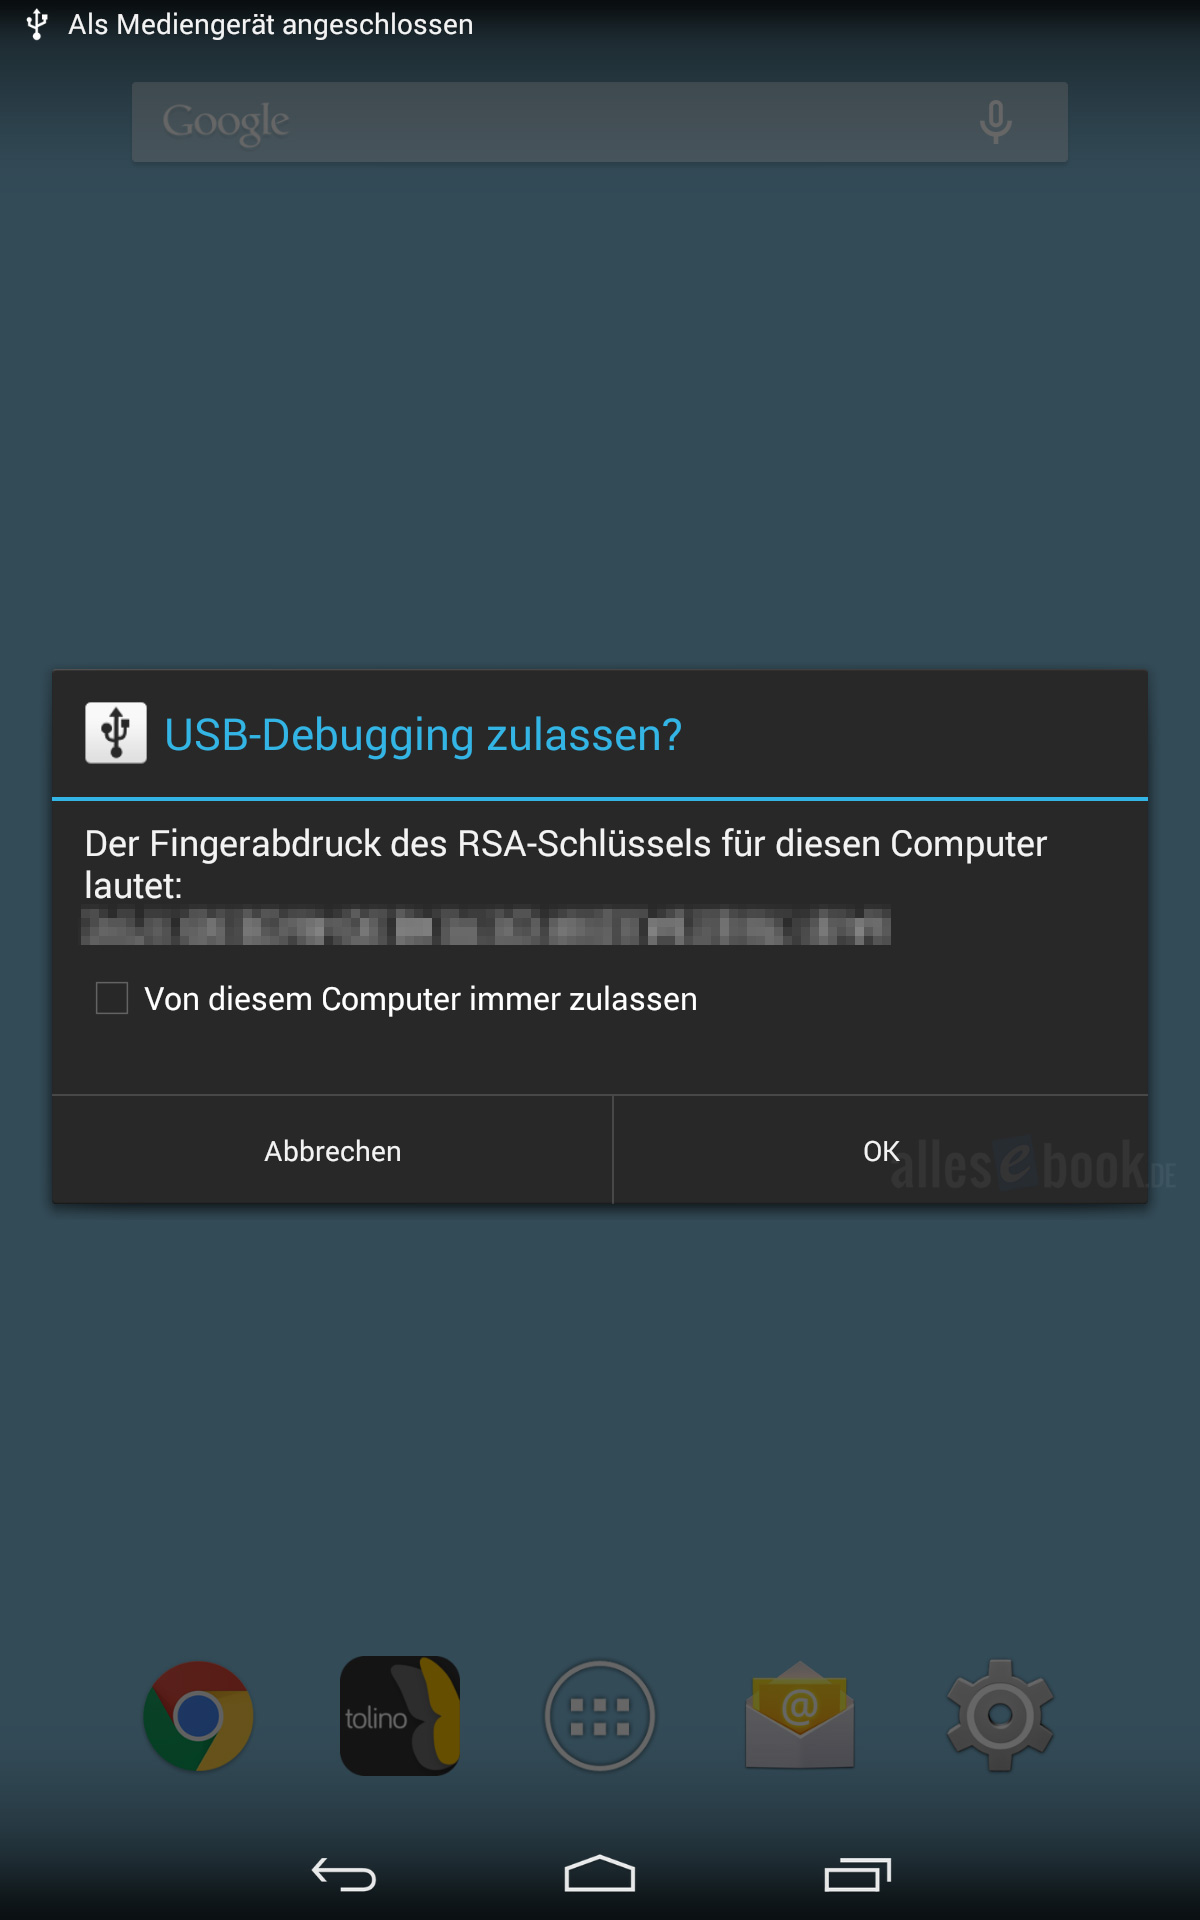
 Now take a look at the tablet. You will be asked if you want to authorize the USB debugging connection. Confirm with “OK”.
- Once again, select the “T4” option on the PC. The Tolino Tab 8 will automatically restart. After a short wait, you’ll find yourself in TWRP or CWM. As mentioned, the touchscreen doesn’t work very well with TWRP, so you will need to quickly and repeatedly tap the display to select a function. With CWM, you use the volume keys (up and down) and the power button (to confirm) to navigate through the simple list menu.
 Select “install zip” -> “choose zip from sdcard” and navigate to the “UPDATE-SuperSU-v2.46.zip” file you previously copied onto the tablet. Confirm the selection and installation, after which the root access including the SuperSU app will be installed.
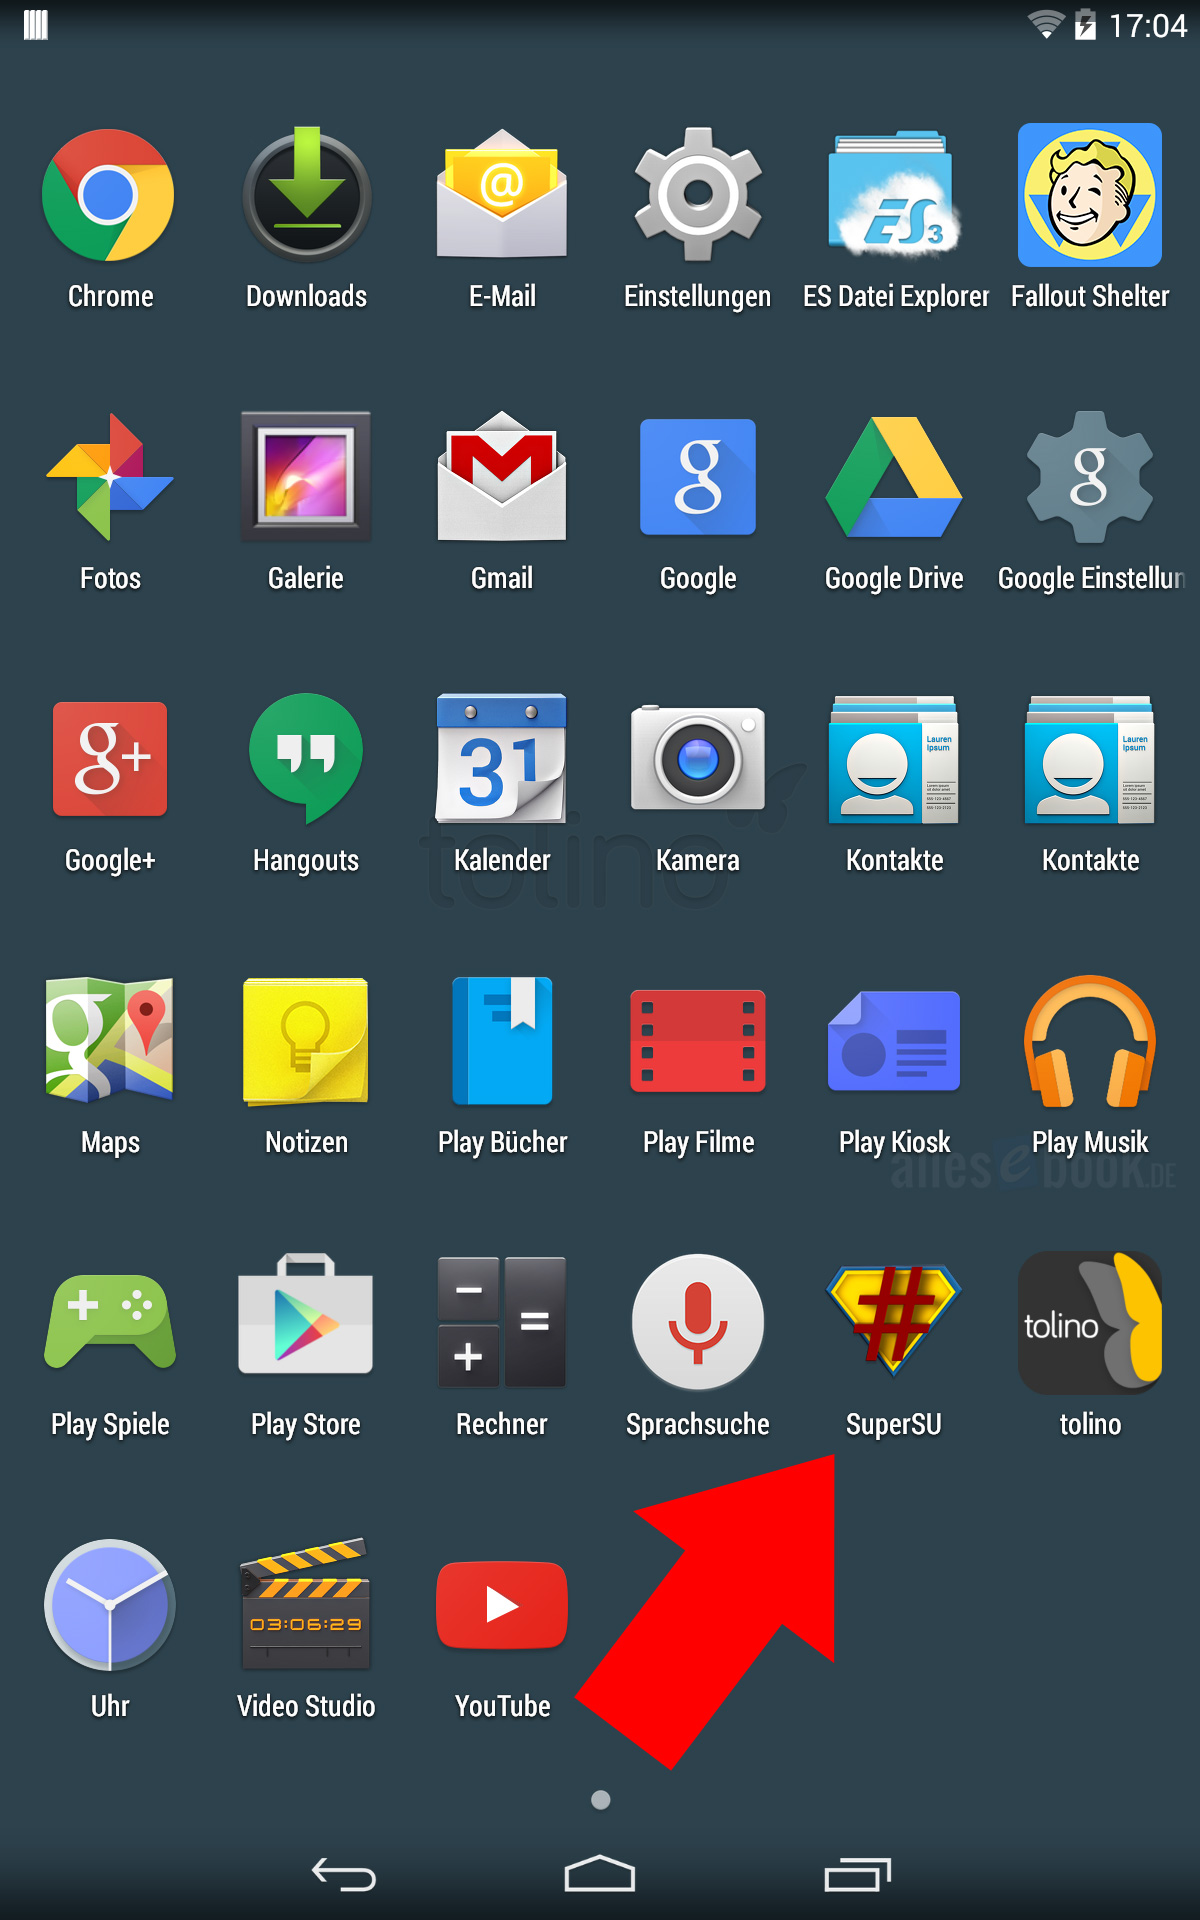
- Once done, restart the Tolino Tab 8 (Reboot System). After rebooting, you’ll find the “SuperSU” app in the app list, and root requests from other programs will be answered with the familiar pop-up window.

That’s it. The Tolino Tab 8 is now rooted and ready for virtually any modification!