
Root and Install Apps on Tolino Page, Shine 2 HD, Vision, and Epos: A Step-by-Step Guide
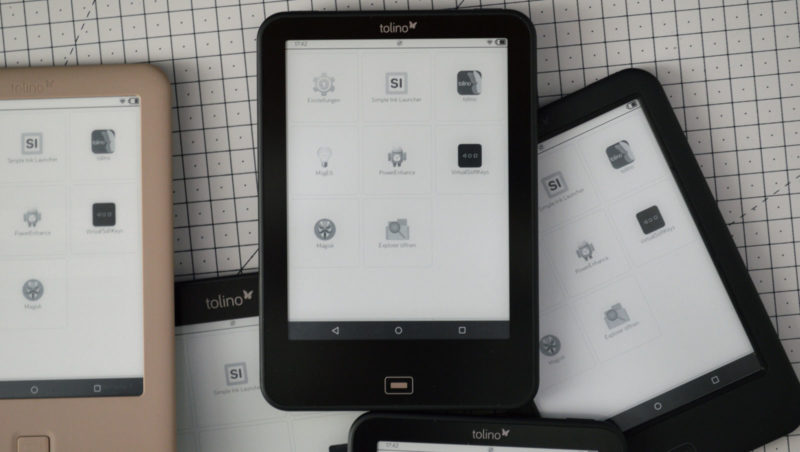
By following the instructions below, you can gain root access on the Tolino Page 1, Shine 2 HD, Vision 1, 2, 3 HD, 4 HD, and Epos 1. You can obtain superuser rights directly on the device (except for the Vision 1—see below), or use Root-ADB from a PC to achieve this.
With root access, you can install your own Android apps and make deep system modifications if needed. You do not need to open the Tolino e-reader for this process.
This guide has been tested with the following e-readers and firmware versions as of 07/17/2022:
Tolino Page 1, Firmware 15.3.0
Tolino Shine 2 HD, Firmware 15.3.0
Tolino Vision 1, Firmware 15.3.0
Tolino Vision 2, Firmware 15.3.0
Tolino Vision 3 HD, Firmware 15.3.0
Tolino Vision 4 HD, Firmware 15.3.0
Tolino Epos 1, Firmware 15.3.0
Installing Apps Without Root
If you’re using a Tolino e-reader with the latest firmware, you don’t necessarily need root access to install Android apps. You can do so without rooting or using ADB. With a simple trick, it’s possible to sideload apps directly from the device storage, without making deep system modifications.
However, this is not a standard feature of the Tolino software. Instead, you make use of the hidden Debug Options menu. Clever users in our forum have discovered this possibility.
The benefits of installing apps without root are clear: you don’t have to flash a modified boot image, so you avoid changing any critical system components. Overall, this is a relatively easy way to install your own Android apps on the Tolino Page 1, Shine 2 HD, Vision 1, 2, 3 HD, 4 HD, or Epos 1.
There are, however, two disadvantages: first, the Tolino developers might remove access to the debug options in future updates, and second, without root, you cannot modify system components. However, the second point is not particularly significant, as most common Android applications do not require superuser privileges.
If you want to install Android apps without root access, follow the instructions on this page.
Below, only the procedure using root access is described.
Things to Know Before You Start
As before, you can obtain root access on the Tolino Page 1, Shine 2 HD, Vision 1, 2, 3 HD, 4 HD, or Epos 1 using the Fastboot service. Fastboot is a development interface that enables various development functions, including flashing a boot image.
With this guide, a custom boot image is flashed via Fastboot. This grants root privileges via ADB on the PC as well as direct access in the Android user interface.
Note: To enable root access through ADB, the original ADBD file had to be modified. The file was patched as described in this excellent guide.
The following step-by-step instructions have been thoroughly tested multiple times on each of the Tolino e-readers listed below. However, it is never possible to anticipate all potential issues or consequences, so the following disclaimer applies:
We accept no responsibility for any problems that may occur and do not offer support. The following procedures may void your warranty. Therefore: Proceed at your own risk!
The rooting process itself takes only a few minutes. However, as the guide is very detailed to help you quickly identify any possible issues, the first attempt, including driver installation, may take longer.
Although root access doesn’t require modifying the e-reader’s memory, it is still advisable to back up all important files on your device beforehand.
ALLESebook Root Package for Tolino Page 1, Shine 2 HD, Vision 1 through 4 HD & Epos 1
The root package provided here is based on official firmware 15.3.2 and has been successfully tested by me on the following e-readers and firmware versions:
- Tolino Page 1, Firmware: 15.3.0
- Tolino Shine 2 HD, Firmware 15.3.0
- Tolino Vision 2, Firmware: 15.3.0
- Tolino Vision 3 HD, Firmware: 15.3.0
- Tolino Vision 4 HD, Firmware: 15.3.0
- Tolino Epos 1, Firmware: 15.3.0
This root package was also tested on the following device, with certain limitations:
- Tolino Vision 1, Firmware: 15.3.0 (The installation of apps works on the Tolino Vision 1 as described, but direct root access on the device does not. For system changes, you will need to use ADB.)
WARNING: Before following this guide, check whether your e-reader is one of the models listed above and if it is running one of the specified firmware versions. Other versions may also work but have not been tested by us. This package is not suitable for any Tolino models other than those expressly mentioned.
To get started, download the root package here and extract the ZIP file to a directory of your choice on your Windows PC:
Download: ALLESebook.de_tolino-page1-shine2-vision1-4hd_epos1_15.3.2_root.zip (31.1 MB)
The package includes, among other things, the following files and folders:
- a_images
- custom_boot.img
- …
- b_usb_driver
- DPInst_x64.exe
- DPInst_x86.exe
- …
- c_adb
- z_daxia.virtualsoftkeys_10.apk (Virtual Navigation)
- z_Magisk-v22.1.apk (Root Companion App)
- z_org.brandroid.openmanager_212.apk (File Explorer)
- z_simple.ink.launcher.1.2.apk (E-Ink Friendly Launcher)
- …
- 1_ANLEITUNG
- 2_INSTALL_usb_drivers.bat
- 3_INSTALL_vendor_id.bat
- 4_FLASH_bootimg.bat
- 5_TEST_adb.bat
- 6_INSTALL_apps.bat
Step-by-Step Instructions
First, install the necessary USB drivers for the ADB interface on your PC. Run the file “2_INSTALL_usb_drivers.bat“. This will install the ADB drivers on your Windows PC. The system will automatically detect whether you are using a 32-bit or 64-bit version. Click through the installation prompts until the process is complete, then you may close both windows (see Figure 1).

Figure 1: USB Driver Installation
Next, you need to add the required device ID for ADB access into your operating system. To do this, run “3_INSTALL_vendor_id.bat“. Without this device ID, the ADB connection will not function, even if the drivers were installed correctly.
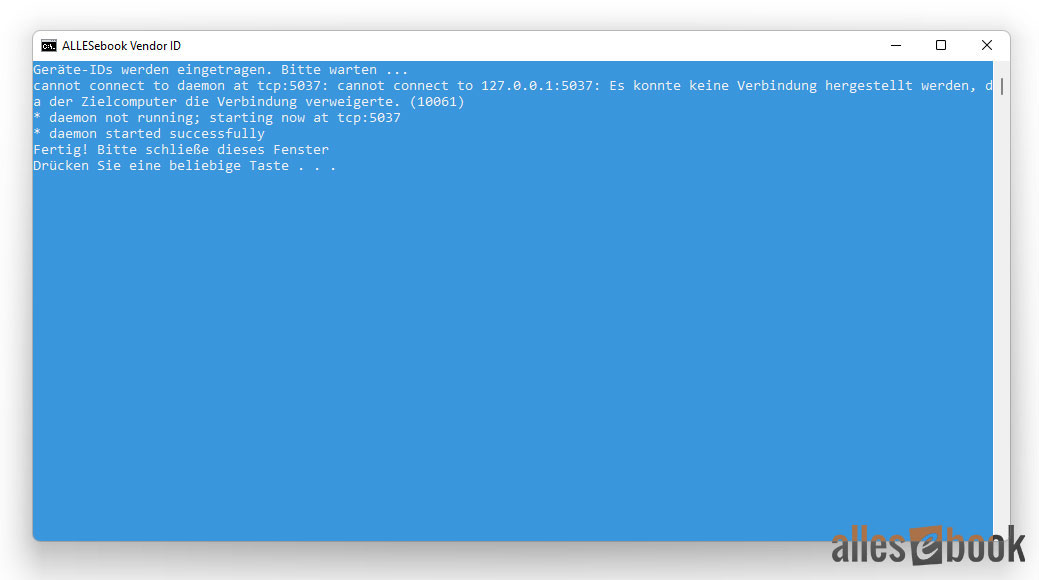
Figure 2: Entering the Vendor ID
After installing the drivers, you need to link them to your Tolino e-reader. This step requires some manual interaction. Before proceeding, ensure your Tolino Page 1, Shine 2 HD, Vision 1, 2, 3 HD, 4 HD, or Epos 1 is running one of the firmware versions mentioned above. Once confirmed, connect your powered-on e-reader to your PC via USB cable. It’s recommended that the battery is (almost) fully charged for the next steps.
With the e-reader connected, switch it off completely. Press and hold the power button until a pop-up appears, then select “Power Off”. Wait a few moments until the device has fully shut down.
Open Device Manager in Windows.
For all models except the Page 1, press and hold both the power button and the light button at the same time, while watching Device Manager. For the Tolino Page 1, hold the home button instead of the light button. Depending on the device, it may take 5 to 10 seconds for the e-reader to enter Fastboot mode. When it does, a new entry appears under “Other Devices”—usually labeled “tolino (?)”, “i.mx6sl NTX Smart Device”, or “USB Developer”.
Right-click on the new device, select “Properties”, and proceed with the driver assignment as shown in the following image sequence.


Once the drivers have been successfully linked, you can continue making changes to your e-reader. Briefly unplug the USB cable and reconnect it before proceeding.
With your e-reader still in Fastboot mode, you can now flash the customized boot image. Run “4_FLASH_bootimg.bat“. A success message (“downloading ‘boot.img’”) will appear in the blue window.

If flashing was successful, your device will reboot to the normal Tolino interface. Unlike before, ADB will now be activated. Test if the ADB connection is working by running “5_TEST_adb.bat“.
If successful, a random character string will appear as the device ID, possibly marked as “unauthorized”. If “unauthorized” appears, briefly disconnect and reconnect the USB cable, then run the file again. Now, the word “device” should appear next to the device ID, indicating that ADB access is available.
If there is no response in the blue window after 30 seconds and you only see “* daemon started successfully *”, close the window, disconnect the e-reader, reconnect it, and try again. If no ADB device or random string is displayed, it likely means the driver installation failed (redo steps 1-6).

You are now ready to install the apps. This step also gives you access to the Android interface. Run “6_INSTALL_apps.bat“. The app installation process will start automatically. Once finished, the Tolino will restart itself.

Final Steps
After completing the previous step, the e-reader will reboot and you will be presented with a launcher selection screen. Select the newly installed “Simple Ink Launcher” and choose “Always”. This launcher will now be set as your default interface.
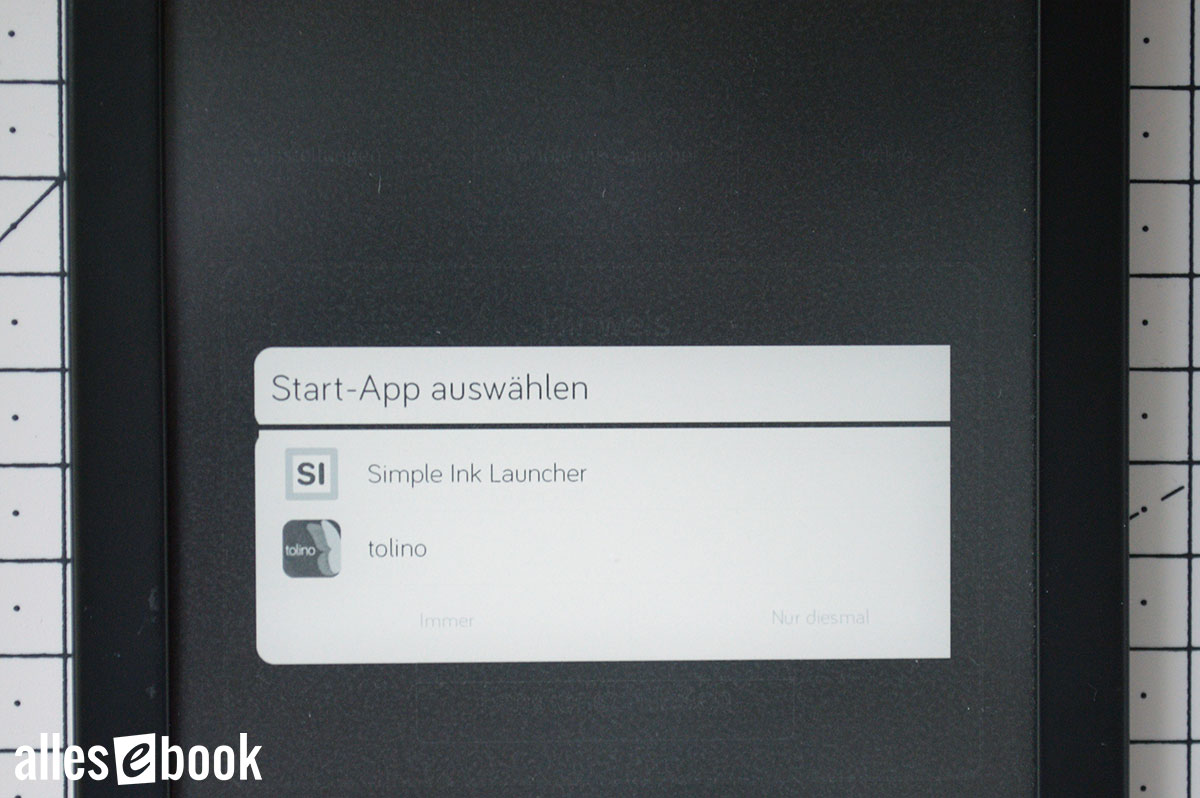
Set Default Launcher
Next, you should enable Virtual Softkeys so you can easily switch between the Tolino app and the Simple Ink Launcher. Without this setup, you would need to restart your e-reader every time you want to return to the launcher.
Activate and Set Up Virtual Soft Keys
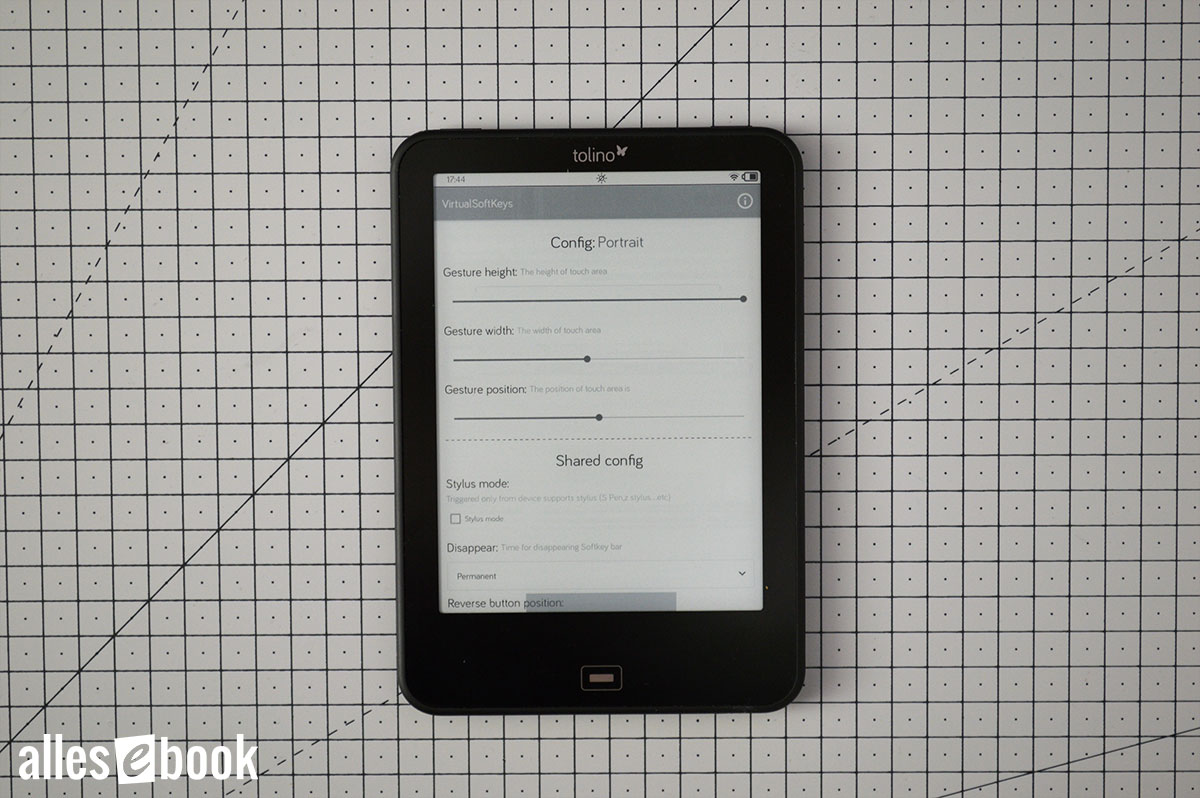
Setting up Virtual Softkeys is straightforward. Simply activate the VirtualSoftKeys option in the accessibility settings to use them.
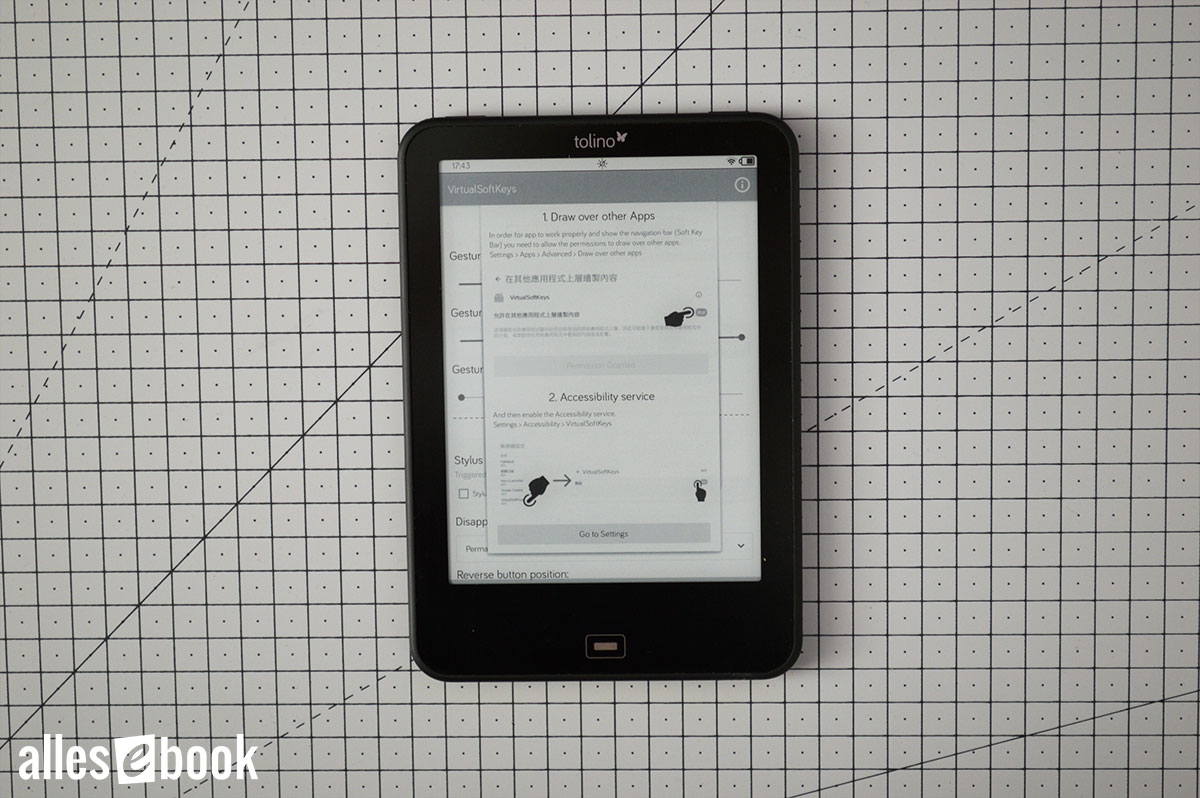
Android permissions must be granted so the app can be used for navigation.
Open the VirtualSoftKeys app, tap the lower (not grayed out) “Go to Settings” button, and enable “VirtualSoftKeys” in the accessibility settings.
To return to the VirtualSoftKeys app, press the home button. Check “Don’t remind” and close the pop-up with the “I knew” button.
You can now adjust the “Gesture height” setting to broaden the area where the virtual buttons appear.
I recommend setting the gesture height to 100% and the width to about 50%. This makes it easier to show and hide the virtual button bar.
Adjusting the “Disappear” timer can also be useful so that the button bar hides itself automatically after use.
You will see your selected area as a dark gray bar at the bottom of the screen. Swiping upwards in this region reveals the button bar, while swiping downwards hides it again.
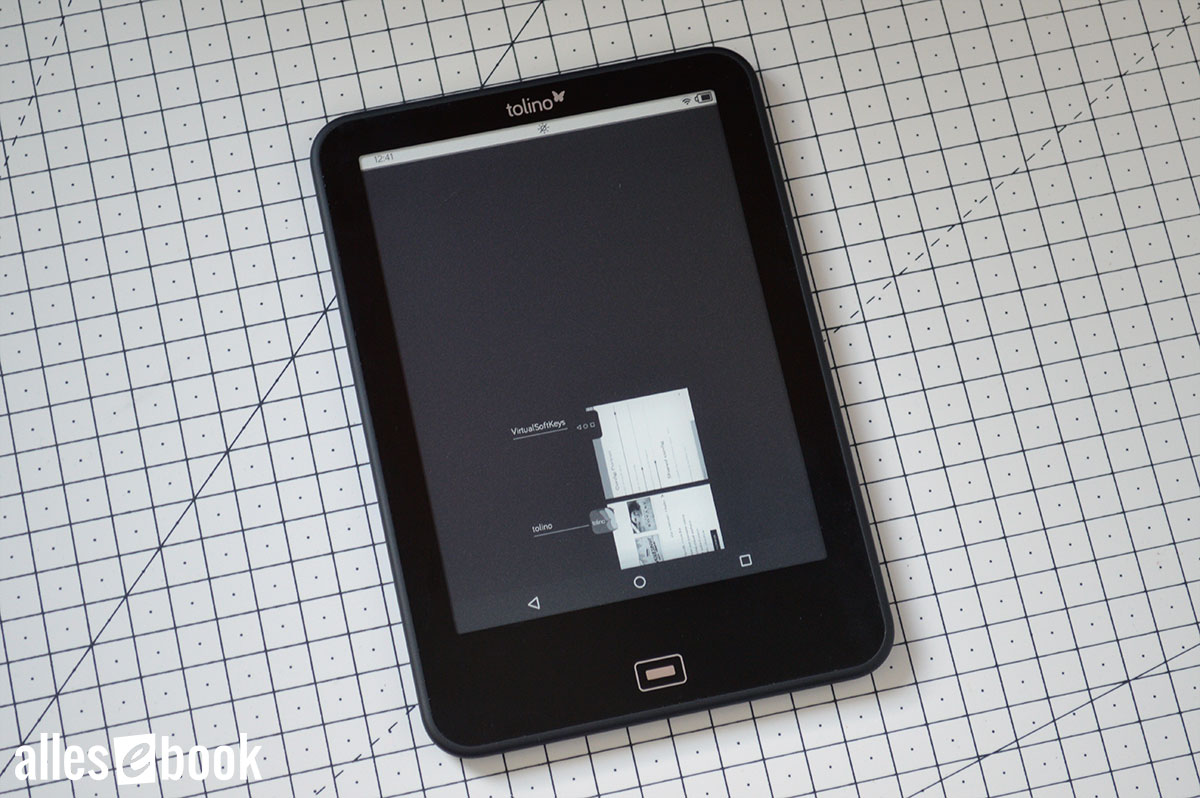
For Tolino models with a home button, tap the black area to return to the new launcher
One notable detail of the Tolino devices mentioned here is how the home button works. The Tolino button is not actually a conventional home button; it functions as a back button. It only acts as a home button when inside the Tolino interface.
This creates a complication: The virtual home button of the VirtualSoftKeys app behaves the same way. That means, if you press the virtual home button while in the Tolino app, you will not be returned to the Simple Ink Launcher.
Softkey Settings
Fortunately, there is a simple solution: Instead of using the virtual home button inside the Tolino app, use the square button to the right. This opens the list of currently running apps. To return to the Simple Ink Launcher, do not tap any of the apps shown; simply tap anywhere in the dark area.
Magisk Root
Root Access with Magisk
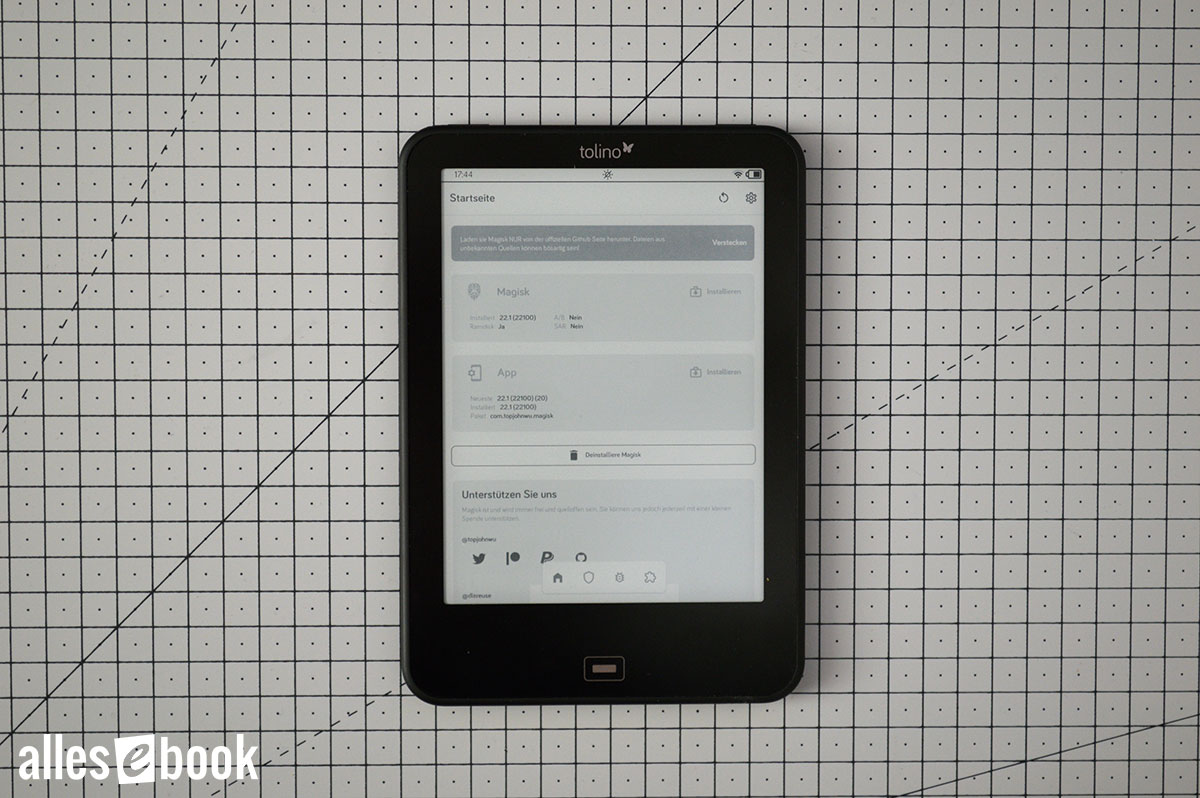
Magisk root access is integrated into this root package as a convenient and maintenance-friendly solution. Open the Magisk app to check your root status.
If, in the “Magisk” section under “Installed”, you see the value “22.1 (22100)”, then you have root access. When an app requests root privileges, a pop-up window will appear, allowing you to grant or deny access. This mechanism also works for superuser ADB access via your PC.
Depending on your device and firmware version, Magisk might require a reboot the first time you launch it in order to apply the final system changes.
Issues with Tolino Vision 1
Unfortunately, the Magisk app is not compatible with the Tolino Vision 1 and always closed automatically during my tests. As a result, direct root access on the device is not available.
If an app requests superuser rights, it will freeze. In this case, you must manually close the app. Switch to the list of running apps (via the square softkey on the right), long-press the app, select “App Info” from the context menu, then force stop it in the Android settings. To avoid this problem, you can uninstall the Magisk app.
If you need to make system changes, you can still do this via ADB root access.
What to Do in Case of Questions or Problems?
As mentioned earlier, I am unfortunately unable to provide support beyond this step-by-step guide. The volume of inquiries is simply too great, and troubleshooting usually requires a significant investment of time.
If you have questions or encounter issues regarding root access, please consult our forum. Not only do I read it, but also several knowledgeable root experts who can share helpful advice.
You may also find answers to your questions in the forum archives. Therefore, it is worthwhile to review older topics and use the search function.