Tolino Vision 5: How to Gain ADB Root Access and Install Android Apps on Firmware 13.1.1 [Step-by-Step Guide]
The following guide was written for firmware version 13.1.1. Please use it only if you are still running this version.
For newer firmware versions, follow this guide
This guide explains how to obtain ADB root access on the Tolino Vision 5 and how to install and use your own Android apps. There is no need to open the Vision to complete this process.
This makes the Tolino Vision 5 a hidden gem for tinkerers, hackers, and individualists, enabling deeper customization of the e-reader’s interface.
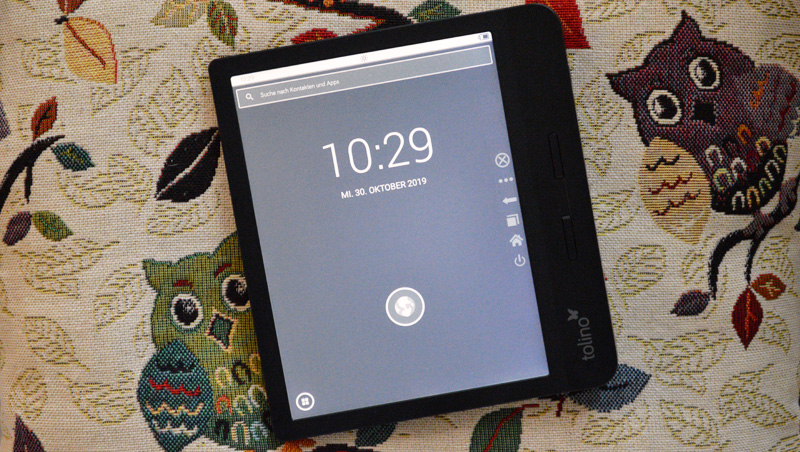
The e-reader is equipped with Android version 4.4.2 and firmware 13.1.1.
ADB Root and App Sideloading
The most important point to note: Direct root access on the device itself is not possible with this guide. However, if needed, you can make system changes via ADB root access from your computer.
You can also install and use your own Android apps by following the steps in this guide. However, without “Superuser” access, only apps that do not require root can be used. For most programs, this is not a problem, so you can use Skoobe and other reading apps without root.
An even more significant change comes with the upgrade to the newer Android version (compared to the Vision 4 HD). The E-Ink screen refresh is now controlled directly by the Tolino app, which causes significant ghosting in other apps and in the Android interface.
Fortunately, there is a solution that even turns this limitation into an advantage. With an E-Ink test app, you can directly access different screen modes. How this works is shown in the following video for the Tolino Shine 3, and it is also described further on in this guide.
Things to Know Before You Start
Sideloading and ADB root are possible on the Tolino Vision 5 thanks to Fastboot, a developer interface that allows you to perform various functions, such as booting and flashing your own (boot) images.
By starting the custom boot image, you gain root access via ADB. You can then install any applications. No security measures are bypassed, no bugs are exploited, and there is no need to open the e-reader.
Although these step-by-step instructions have been thoroughly tested several times, the usual disclaimer applies:
We accept no responsibility for any issues and offer no support. The following steps may void your warranty. Proceed at your own risk!
The guide is comprehensive and designed to help you quickly identify and resolve potential errors. In practice, following the instructions only takes a few minutes.
While access to eBooks is not affected, it’s recommended to back up all files on the device to be safe.
ALLESebook Root Package for the Tolino Vision 5
The root package provided here was created using the official firmware 13.1.1. It has been successfully tested with the Tolino Vision 5 with version 13.1.1.
WARNING: Before starting, make sure your Tolino Vision 5 is running version 13.1.1. Other versions may also work, but we have not tested them.
The package contains the following files and folders:
- 1_images
- custom_boot.img
- 2_usb_driver
- DPInst_x64.exe
- DPInst_x86.exe
- …
- 3_adb
- z_nook_clear.apk (Clear Screen for manual page refresh)
- z_button.apk (Button Savior – virtual buttons)
- z_smartlauncher.apk (Smart Launcher – home screen)
- z_tcandroid202.apk (Total Commander – file explorer)
- z_TestEink.apk
- …
- 1_INSTRUCTIONS
- 2_INSTALL_usb_drivers.bat
- 3_INSTALL_vendor_id.bat
- 4a_BOOT_bootimg.bat
- 4b_FLASH_bootimg.bat
- 5_TEST_adb.bat
- 6_INSTALL_apps.bat
Step-by-Step Guide
Before making any changes to your device, you need to install the correct USB drivers for the ADB interface. To do this, run the file “2_INSTALL_usb_drivers.bat.” This will install the necessary drivers on your Windows PC. The system will automatically detect whether you have a 32-bit or 64-bit operating system. You will need to complete the driver installation manually. Once finished, you can close both windows (see Figure 1).
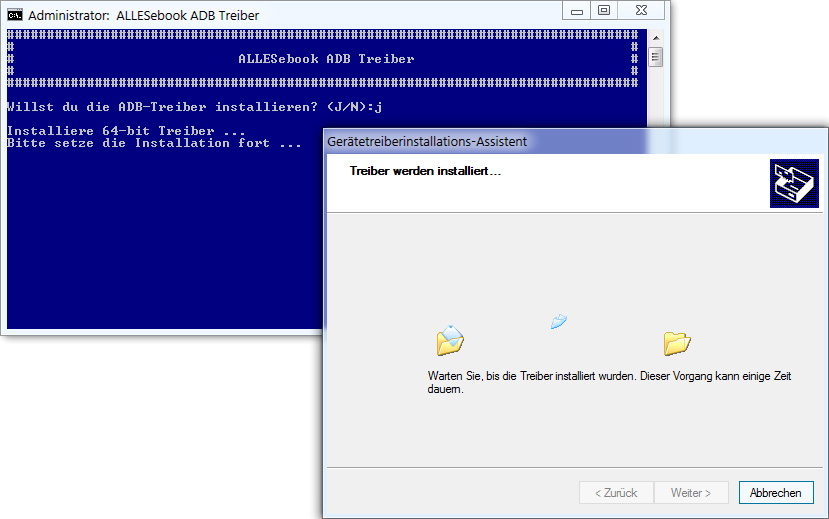
Figure 1: ADB Driver Installation
The file “3_INSTALL_vendor_id.bat” adds the necessary device ID for ADB access to the operating system (see Figure 2). Without this ID, the ADB connection will not work, even if the drivers are correctly installed.
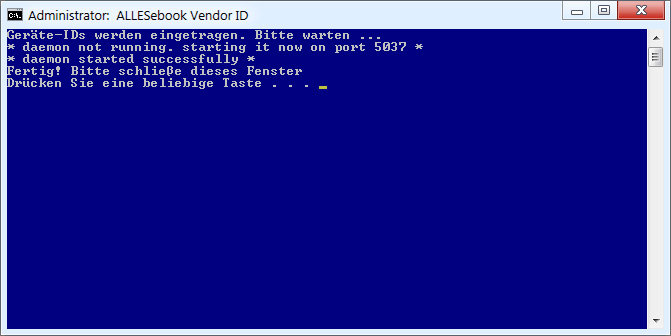
Figure 2: Vendor ID Entry
Before proceeding, double-check that firmware 13.1.1 is installed on your Tolino Vision 5. If so, connect your powered-on Vision 5 to your PC using a USB cable. For best results, the battery should be (almost) fully charged before continuing with the next steps.
While the e-reader is still connected via USB, turn it off completely. Hold the power button and select “Turn off” from the pop-up window.
In the next step, the ADB drivers need to be linked to the device. If you have previously rooted another Tolino e-reader on the same PC, this step can be skipped. If this is your first Tolino root, you need to work quickly. Fastboot mode on the Vision 5 (as with the Shine 3) remains active for only a few seconds before the device restarts automatically. Follow the instructions, and be prepared to repeat the process if needed until you succeed.
Open Windows Device Manager.
Now, press and hold the power button on your Tolino Vision 5. There will be no visual feedback, so watch Device Manager on your PC. It takes about 30 seconds for the e-reader to enter Fastboot mode, after which it switches to Recovery mode. When Fastboot is active, a new entry appears under “Other Devices,” such as “tolino (?)” or “i.mx6sl NTX Smart Device.”
Right-click the new device, select “Properties,” and follow the image sequence below for the next steps.
If you were not quick enough, repeat the process until you can access the device settings. The steps below will work even if the ADB device is no longer connected.


You now have two options: You can start the prepared boot image to temporarily gain root access via ADB, or you can flash the image for permanent root access. For most users, the temporary method will suffice and is also safer. Should the e-reader become unresponsive for any reason, you can revive it by pressing and holding the power button, since no permanent changes have been made. Choose one of the following methods:
- To boot without permanent ADB access, run 4a_BOOT_bootimg.bat, OR
- To flash for permanent ADB root access, run 4b_FLASH_bootimg.bat
After launching the selected file, your PC will wait for a connection. Turn off your Tolino Vision 5 again. Once the device is fully powered off, start Fastboot as described previously, holding the power button for about 30 seconds. Release the button only when a success message appears in the blue window (“downloading ‘boot.img'”).
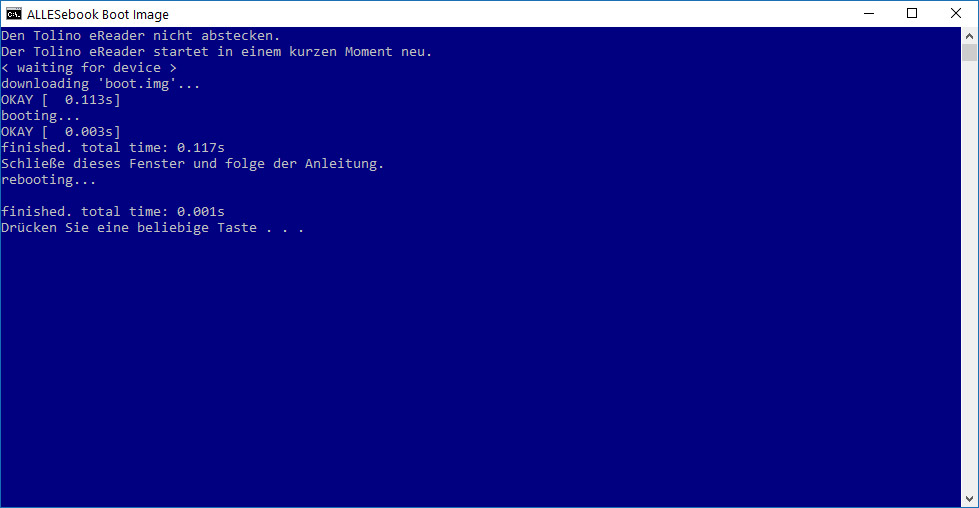
If everything worked correctly, you’ll return to the regular Tolino interface. Unlike before, ADB is now active. To check, run “5_TEST_adb.bat” after the Vision 5 has fully booted. A new window will open if an ADB device has been found. If successful, you’ll see a random string displayed as the device ID. If nothing happens and only “* daemon started successfully *” is shown for at least 30 seconds, close the window, unplug the e-reader briefly, reconnect it, then run the file again. If ADB is still not detected and the random string does not appear, the driver installation might not have succeeded (review Steps 1-6).
Finally, you can proceed to app installation to unlock the Android interface: Run “6_INSTALL_apps.bat”. Several apps will be installed automatically, and then the Tolino Vision 5 will restart itself.

Activate Virtual Buttons
The apps are now installed on the e-reader. To ensure smooth operation, follow these steps:
After the Vision 5 has restarted, you’ll see the launcher selection screen. Choose “Smart Launcher” to enter the Android user interface.
To navigate the Android interface, you’ll need to activate Button Savior. Open the app drawer and launch Button Savior. A small arrow will then appear on the right edge of the screen.
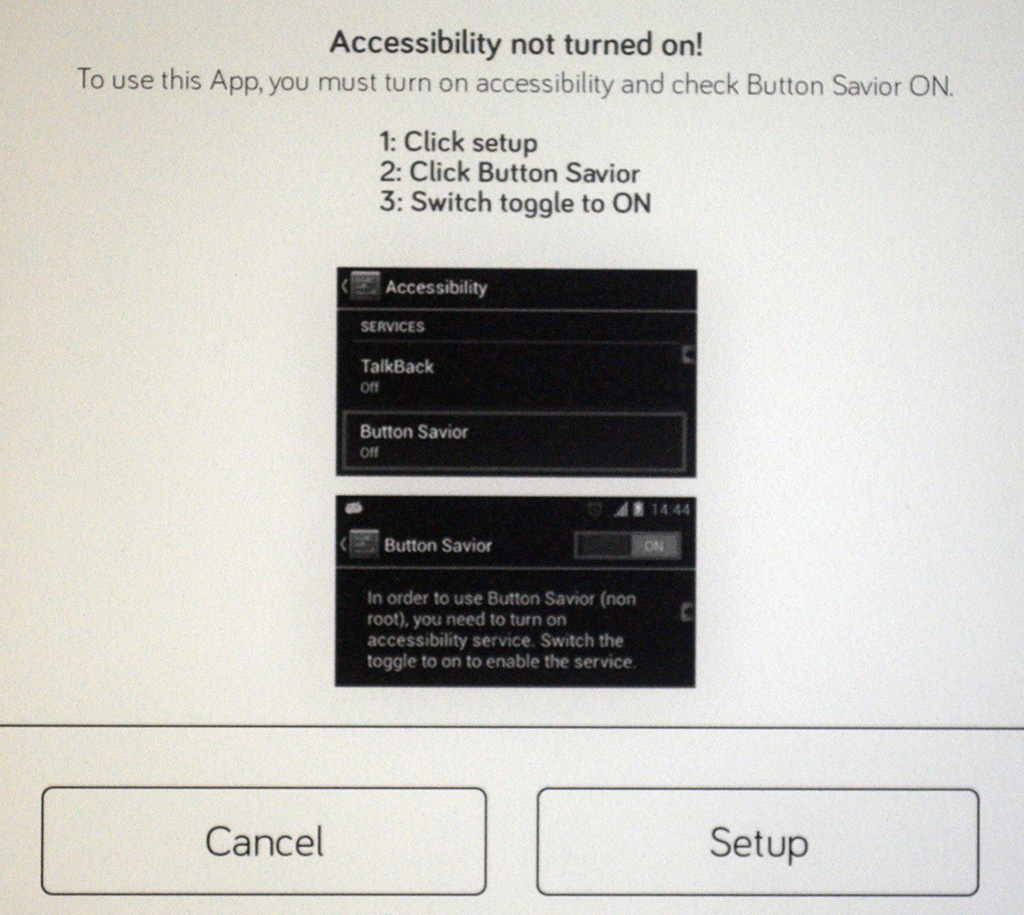 You will be prompted to add Button Savior to the Accessibility settings. Once this is done, press the small arrow on the right to display the virtual buttons (Home, Back, etc.). These buttons allow you to navigate the Android interface, and Button Savior remains visible even when the Tolino interface is open.
You can adjust the appearance and position of Button Savior in its settings.
If enabling Button Savior in Accessibility does not work for any reason, restart the e-reader. Switch back to the Smart Launcher interface and go directly to the device settings to activate the option there.
Vision 5 Screen Refresh
The second important step is to adjust the screen refresh. To achieve the same results shown in the video above, you’ll need to make additional configuration changes. Open the app drawer and start the “TestEink” app.
Make the following selections:
- Choose a waveform mode: GLR16
- Choose an update mode: FULL
- Choose a wait mode: NOWAIT
- Choose a monochrome mode: NOMONOCHROME
- Choose a hardware dither mode: DITHER_COLOR_Y4
- Choose a software dither mode: Android_ARGB8888
- Tap “Go to testing” and tap the screen at least once to trigger a flicker.
- Exit the testing environment using Button Savior’s virtual buttons.
You are free to experiment with other settings. In my experience, these modes provided the best results, allowing most Android apps to run without ghosting.
Your Tolino Vision 5 can now run your own apps and offers root access via ADB (if you have flashed the boot image).
Further Steps
Finally, here is a short explanation for first-time Android users on the Vision 5:
- Select Smart Launcher (or another launcher you installed) as the default home screen.
- Add the TestEink app to your application list for easy access. This way, you can quickly switch between E-Ink modes. If the e-reader enters standby for a while, you may need to reset the modes.
- If E-Ink mode is set as described above, use the Nook Clear Screen app for a full screen refresh to remove ghosting.
- To copy eBooks or other files to the Tolino Vision 5, make sure the Tolino app is running in the foreground when you connect the device to your PC. Otherwise, your PC may not reliably detect the mass storage mode.
- You can install additional apps via sideloading.
- For system-level changes, you must perform these manually via the ADB root connection from your PC.
- The appropriate Skoobe app without page-turn animation can be downloaded directly from Skoobe.
That’s it. The Tolino Vision 5 can now be used as a high-quality Android E-Ink tablet. Thanks to the ability to adjust E-Ink mode, it stands out as one of the best Android e-readers. Enjoy!