Guide to Upgrading Your Tolino Shine 2 HD Storage: Expand Memory with a New MicroSD Card
The unveiling of the Tolino Shine 2 HD at the Frankfurt Book Fair wasn’t entirely unexpected due to a leak, but its technical similarity to the Vision 3 HD still surprised a bit. After all, there’s a quite large price gap between the two siblings, which, at least in my opinion, doesn’t really reflect in practice.
This is also because the price-performance ratio of the new Shine, due to its direct competition with the Kindle Paperwhite, is truly excellent. The ratio gets even better with the recently attained root access for both new Tolino models.
However, one disadvantage that rooting cannot alleviate is that the storage of the Shine 2 HD and Vision 3 HD cannot be expanded. In both cases, you have to make do with the internal memory of 4 GB (about 2 GB available to the user). In the case of the Vision, it has often been argued in the past that a memory card or card slot cannot be made waterproof, like the rest of the nano-sealed electronics, without significant investment by the manufacturer. In the case of the Shine, it seems they likely didn’t want to offer a significant advantage to the considerably cheaper model (thereby cannibalizing Vision sales).
Nevertheless, tinkerers can free the Tolino Shine 2 HD from the memory shackles, as the device, like many other eBook readers, has an internal microSD card that can be replaced.
Before diving in, let’s start with the usual caution:
Note: Opening the device may void the warranty and can cause damage if handled improperly. As always, following the instructions is at your own risk!
To prepare, turn off the eReader completely. Then, download the following two programs to your PC:
- Win32 Disk Imager (for cloning the memory card)
- Minitool Partition Wizard (for changing partition sizes)
Both programs need to be installed.
Remove the Back Cover
To change the internal memory card of the Shine 2 HD, the device must be opened, meaning the back cover must be removed.
This is indeed the biggest challenge of the whole procedure, as the back cover is extremely tight. It took me several tries to detach the back. The most challenging part was finding a sufficiently thin and hard object that could be slipped into the gap between the back cover and the rest of the housing.
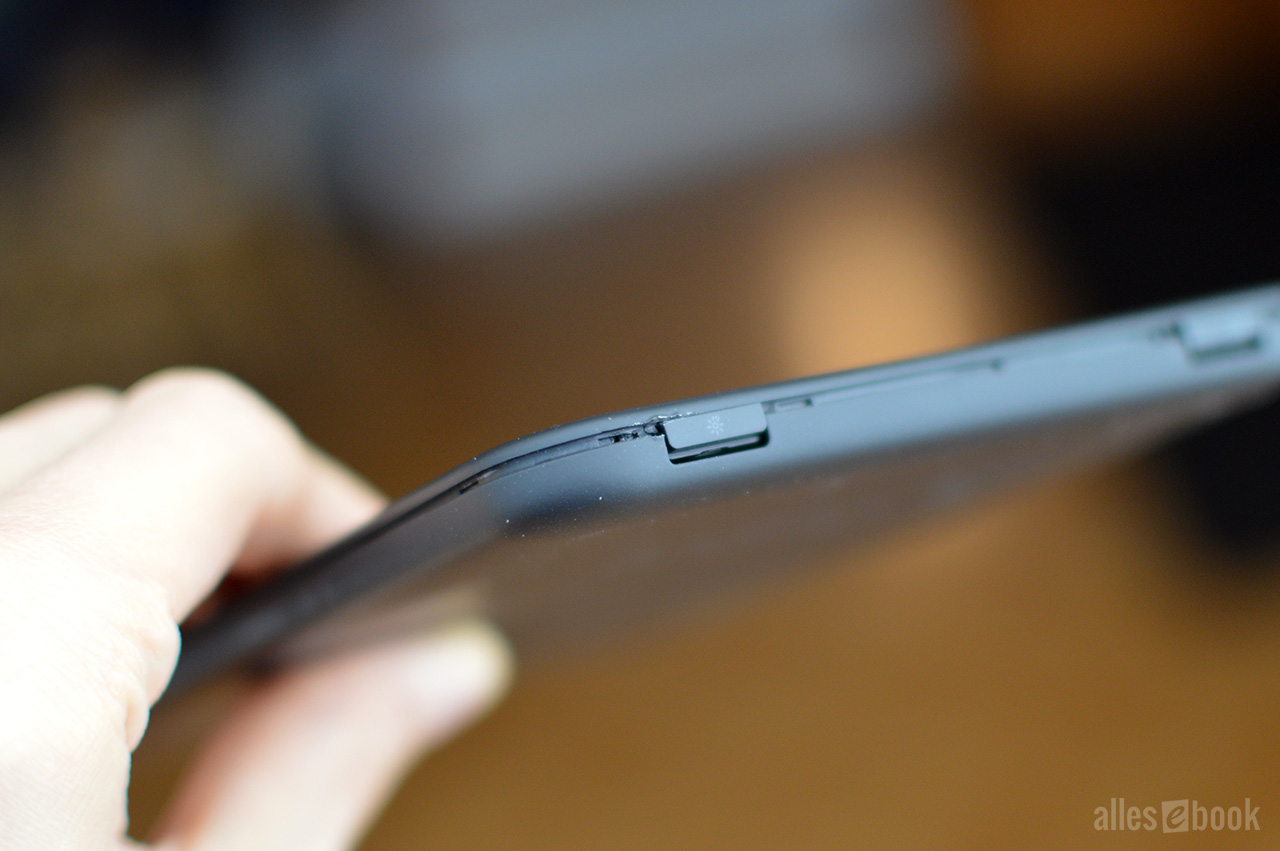
I couldn’t remove the tightly sealed back cover without leaving wear marks.
Ultimately, I was able to use a watchmaker’s screwdriver near the light button as a lever to get an old credit card into the gap and detach the back step by step. However, the Tolino Shine 2 HD incurred a few minor battle scars: the light button and surrounding plastic were slightly damaged. The damage is only cosmetic; the button still works flawlessly.
If you’re planning to do this yourself, it’s crucial to be delicate and patient. However, you should expect that the housing might have a few nicks by the end of the process.
In this context, I can mention that I’ve never had such a hard time opening an eBook reader as I did with the Shine 2 HD. This certainly speaks well of the device’s craftsmanship!
Remove and Clone the Memory Card
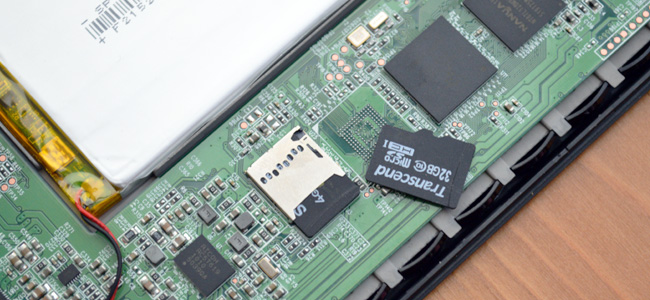
Alright, once the cover is removed through painstaking work, you can finally get to it. The eReader without its cover looks like many other models on the market. The device is clearly based on the same reference design as the Kobo Glo HD. The circuit boards of the two competitors have many similarities (but also a few relevant differences—more on that soon in another article).
You can easily pull the microSD card from the slot, though a resistor (R 313) slightly blocks the card. By gently prying the card with your fingernail, it can be removed without causing damage.
Insert the removed 4 GB memory card into the card reader on your PC and start the Win32 Disk Imager application there. For safety (to avoid selecting the wrong device), external hard drives should be turned off/unplugged.
Preparing Disk Imager
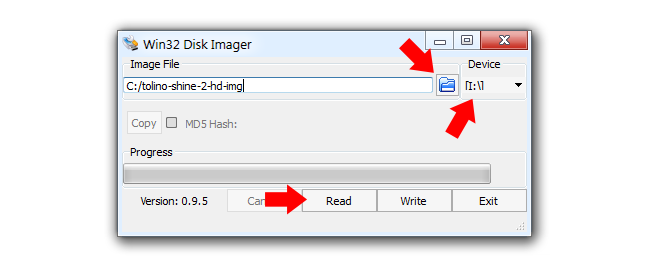
Now, click on the field under “Device” and select the drive letter of the microSD card. In my case, it’s “I:,” but depending on your PC configuration, it might be a completely different letter. Double-check in the file explorer to ensure you’ve made the right choice.
With a click on the folder icon, the directory structure opens. Navigate to any location and enter a file name like “tolino-shine-2-hd-img” or similar. This file will contain the complete Tolino file system.
Once that’s done, start the read process by clicking “Read.” Now, you wait a few minutes until the loading process is complete.
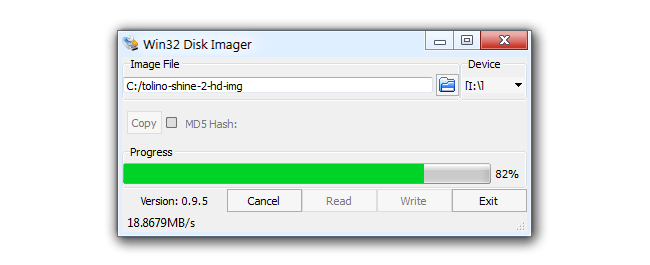
The contents of the memory card are written into a local file
Then switch the memory card. Now, the larger (empty) microSD card should be in the card reader on the PC. Again, select the correct drive letter of the new memory card in Win32 Disk Imager for Device. Use the folder icon to select the previously written file “tolino-shine-2-hd-img.”
Then click “Write” and wait a few more minutes until the writing process is complete.

In this step, all Tolino content is cloned onto the new microSD card
Enlarge the Partition
Now, you’ve cloned the memory card of the Tolino Shine 2 HD. However, to actually have more storage space available, you need to modify one of the partition sizes. Now, the “Minitool Partition Wizard” program comes into play.
Once it’s launched, select the memory card. It contains nine partitions, as well as two unallocated areas (gray).
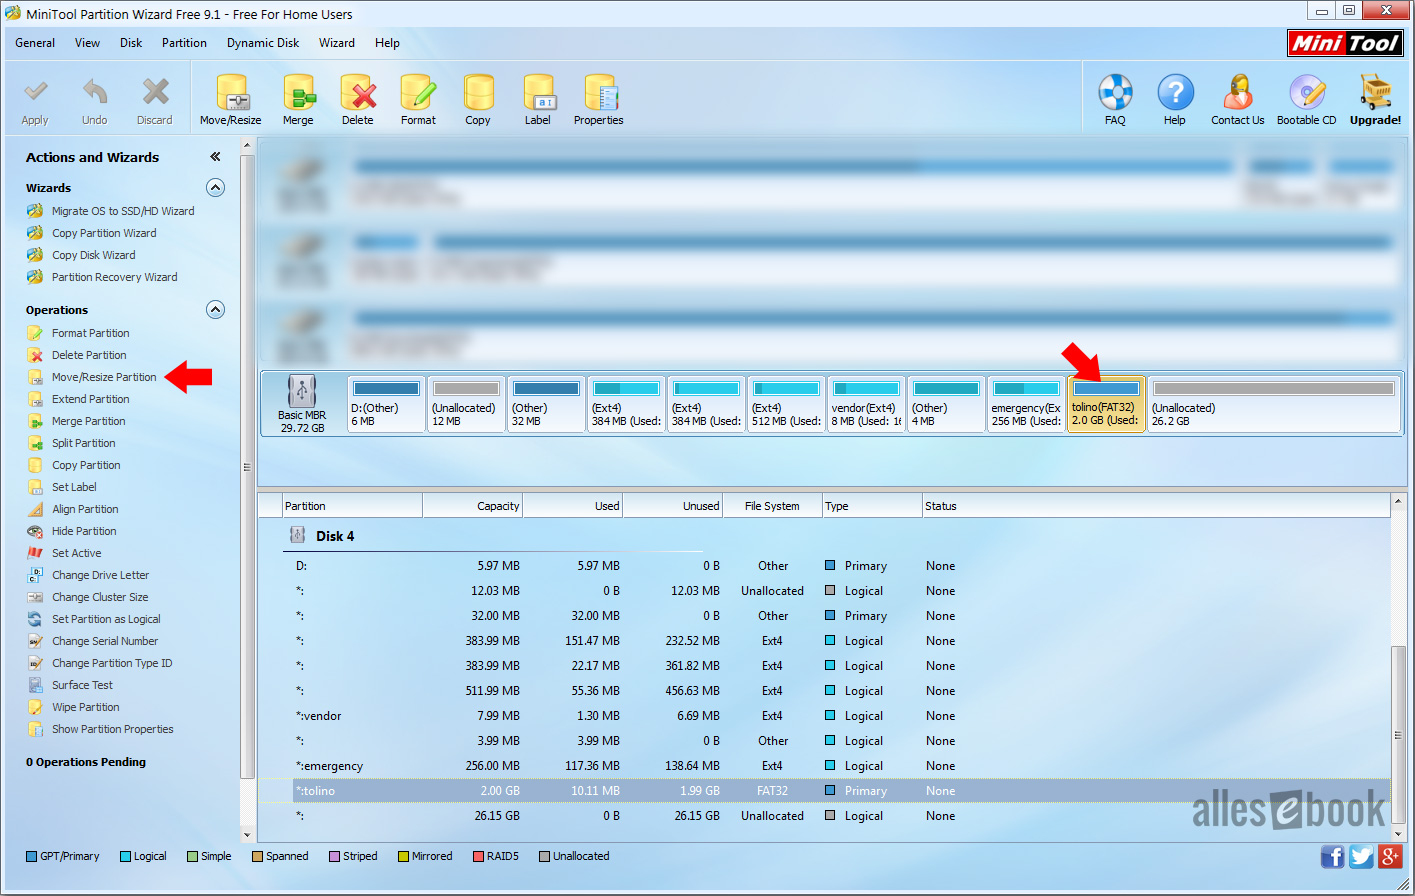
Select the memory card and the FAT32 partition named “tolino”
Select the “tolino” partition with the FAT32 file system. It’s the only one with this name and file system on the memory card. Now click on “Move/Resize Partition” in the left column.
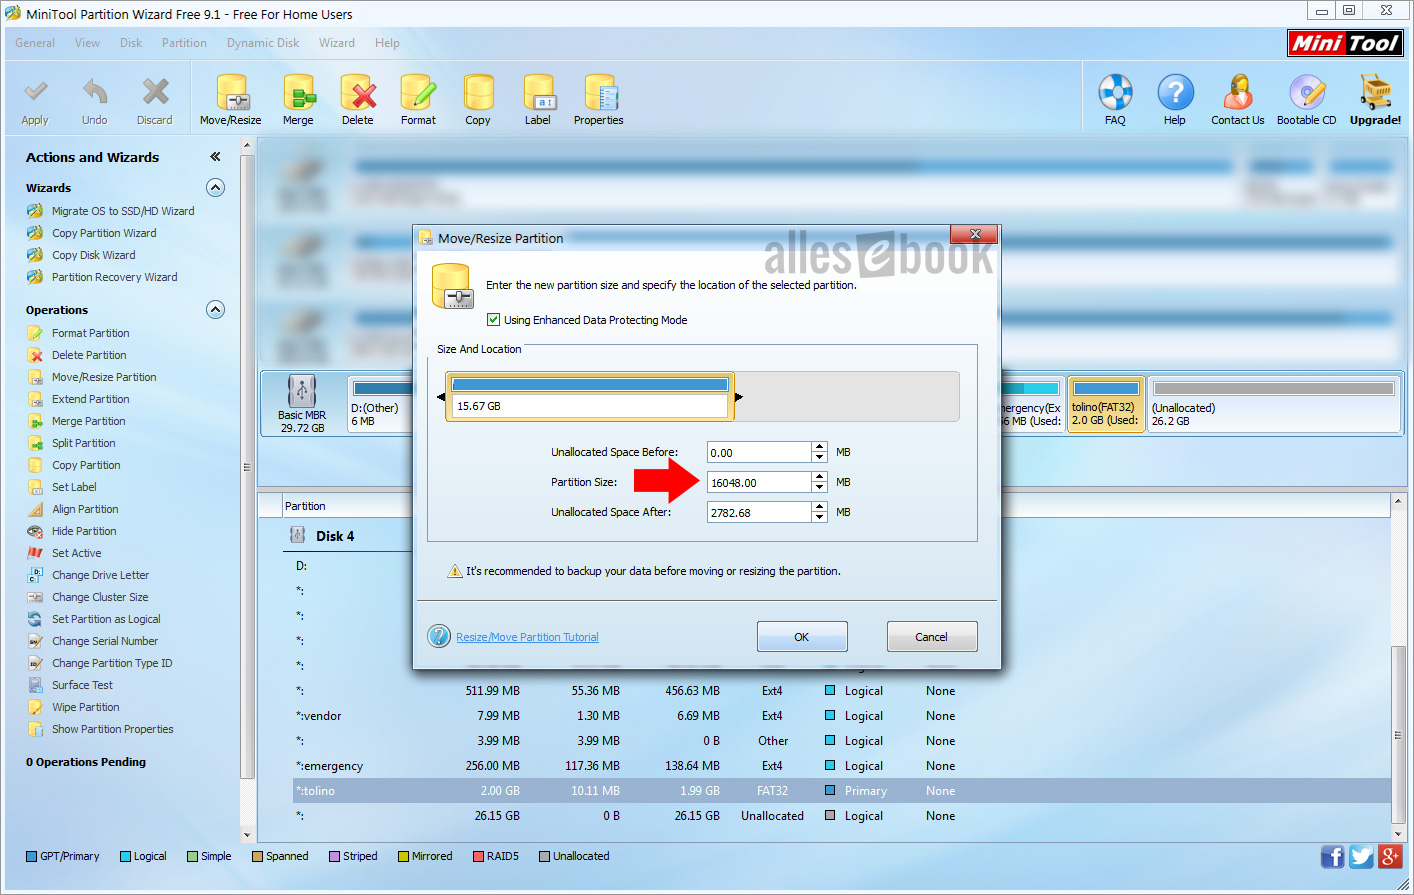
Adjust the size
In the new window, enter the desired size. Here, you can allocate the entire unallocated space. In the screenshot, I’ve assigned about 16 GB (for testing) – you can set the size yourself. It makes sense, however, to use the entire unallocated space of the microSD card.
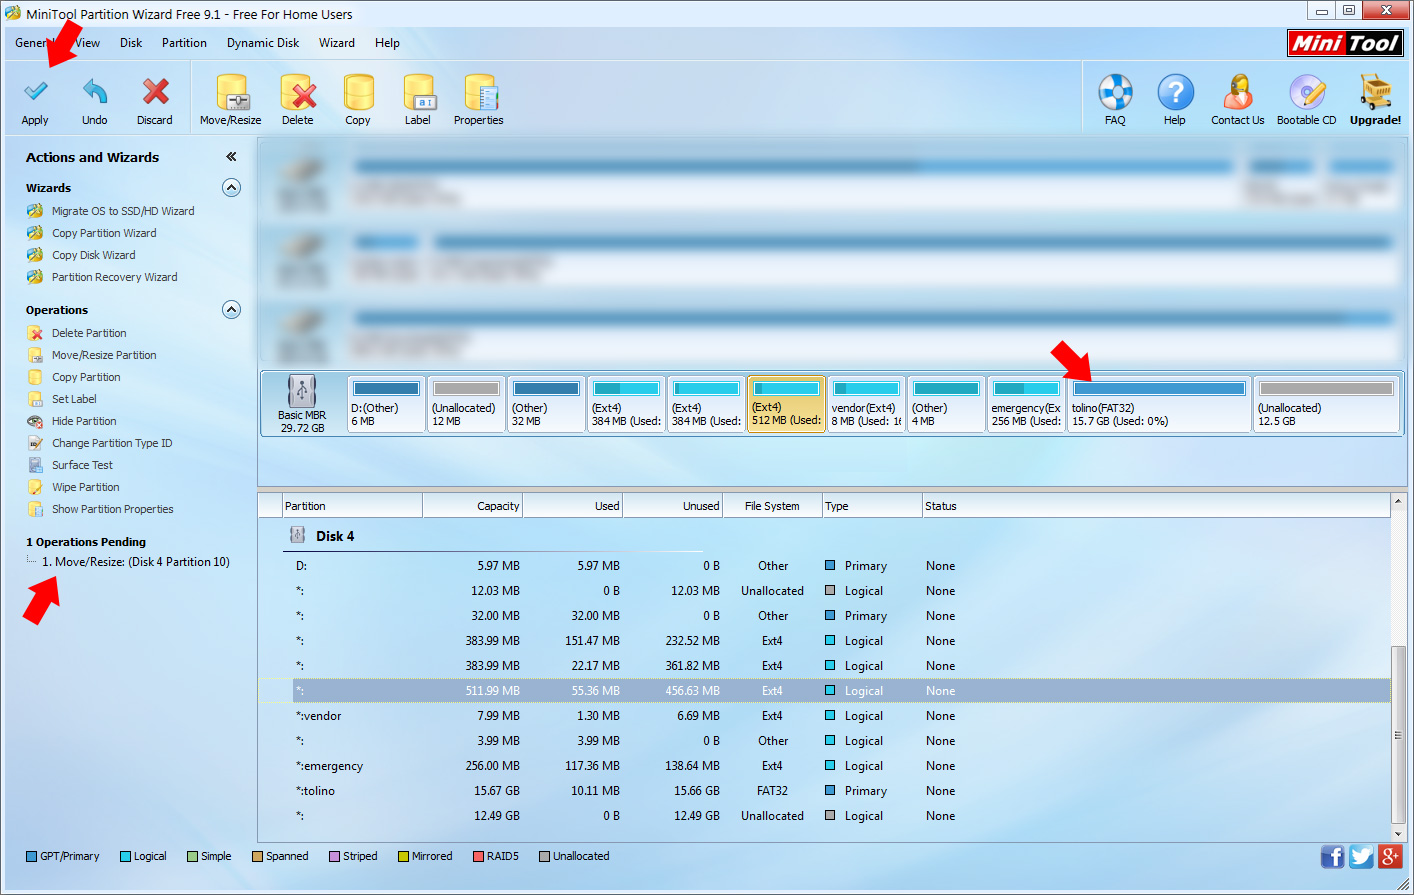
Check the entries and apply
Once that’s done, double-check that the desired change has been saved. Look at the Tolino partition and the “Operations Pending” point. There should be just one operation, “Move/Resize.”
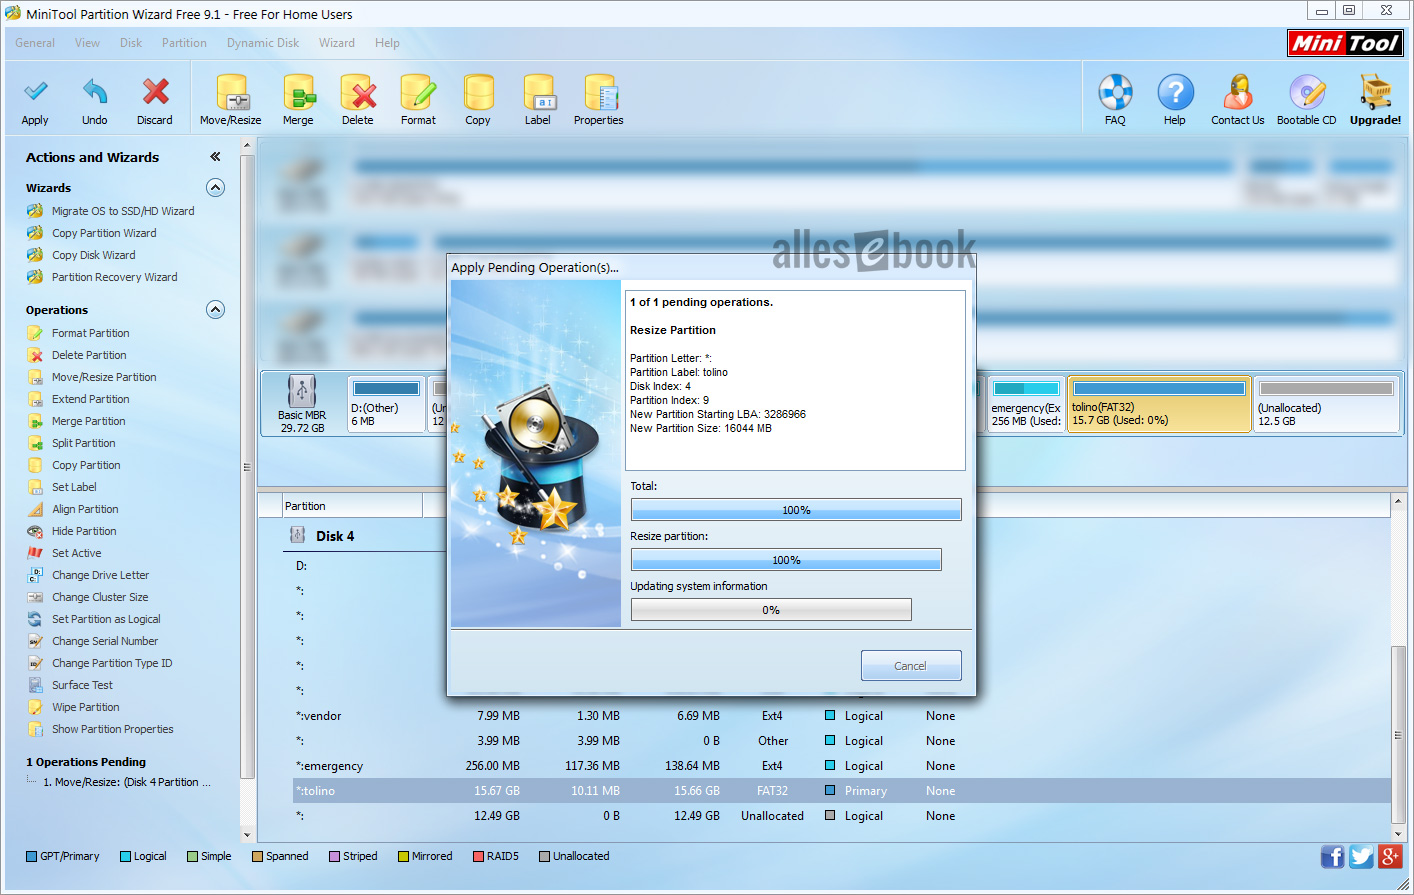
Changes are being made – now just wait a few minutes.
Once that’s completed, click on “Apply.” Now, you have to wait a few minutes for the partition to be enlarged.

Only when the notice “Applied all the pending changes successfully.” appears is the process successfully concluded. This means you’ve enlarged the eBook partition of the Tolino file system.
Result: Tolino Shine 2 HD with 32 GB Storage
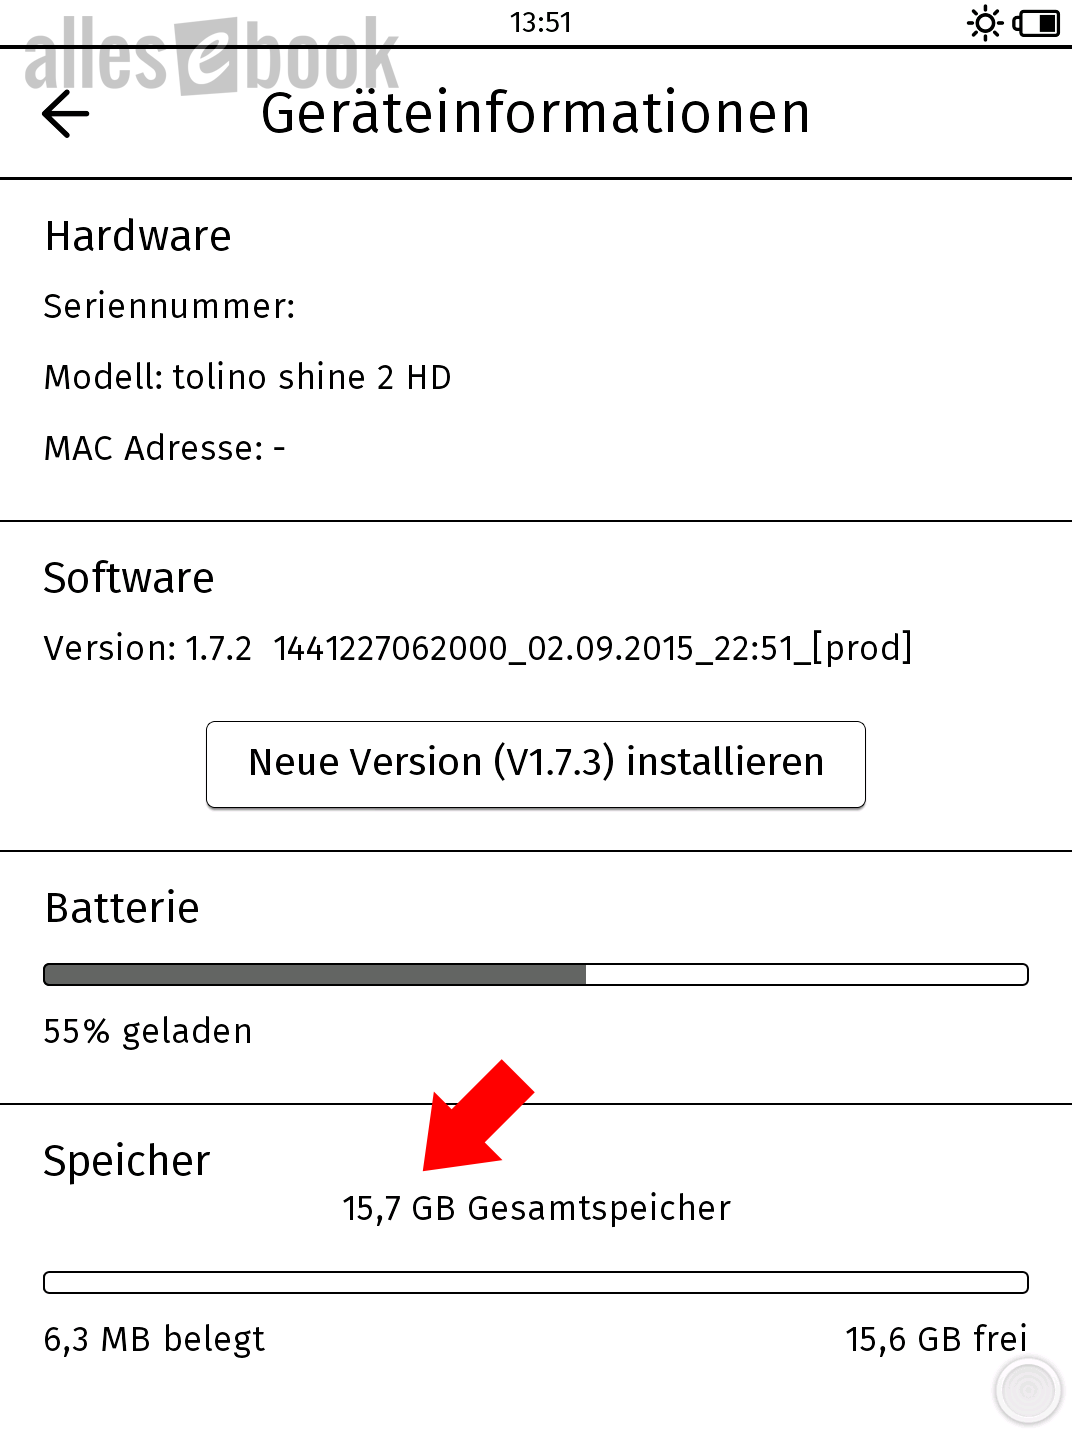
Changed total storage size
The new microSD card can now be placed back in the eBook reader. Once that’s done, you can revive the Tolino Shine 2 HD and press the power button.
The device should now boot up as usual and land on the home screen. To verify that everything went smoothly, go to the device settings and open “Device Information.”
At the bottom of the screen, the storage size should now reflect the chosen partition size. In my case, around 16 GB (see above).
And that’s it! The Shine 2 HD now has a significantly larger internal memory, which means even avid eBook collectors shouldn’t reach its limits any time soon.
I successfully performed the process with a 32 GB microSD HC card. Whether larger microSD XC cards also work, I can’t say for sure – if you know, leave a comment and let us know ;).